
How to Track GA4 Ecommerce Events on Squarespace
This is a step-by-step guide to implementing Google Analytics 4 ecommerce tracking on Squarespace websites using Squarespace’s native integration. It’s based on Google’s official developer documentation.
⚠️Warning: Squarespace's native GA4 integration only tracks purchases— which isn’t very helpful if you want to analyze the entire ecommerce journey.
If ecommerce analytics is a priority for your business, I suggest utilizing my GA4 Enhanced Ecommerce for Squarespace code for a DIY setup, or hire me for a full-service implementation that comes with a Squarespace ecommerce analytics dashboard.
This way, you'll have the ability to track the entire purchase flow instead of using the limited native Squarespace + GA4 integration.
Discover which products users view the most
See which products customers add and remove the most from their cart
Analyze what pages people visit on your website before and after entering the purchase flow
View how many people leave your checkout flow before purchasing
Here's what real Squarespace ecommerce owners are saying after successfully implementing GA4 tracking with my custom code:
If you follow the directions in this blog, you will be able to analyze your purchase ecommerce data in Google Analytics 4:

To see the entire funnel like in the screenshot above, you’ll need to download my custom code, or use my Squarespace integration service.
Highlights

Tired of struggling with your Google Analytics setup?
Let me handle it for you! My Squarespace + Google Analytics integration is done in less than a week, giving you the valuable insights you need to grow your revenue fast.
Let me do the heavy lifting, so you can focus on your business. Book a 30 minute call with me today!
How to Set Up GA4 Ecommerce Events Using Squarespace’s Native Integration
To track conversion events using Squarespace’s native integration, you have to add your Google Analytics measurement ID to Squarespace.
How to find your measurement ID in Google Analytics 4
Navigate to Admin > Property Settings>Data collection and modification>Data Streams>select your data stream>copy the measurement ID, it starts with “G-”

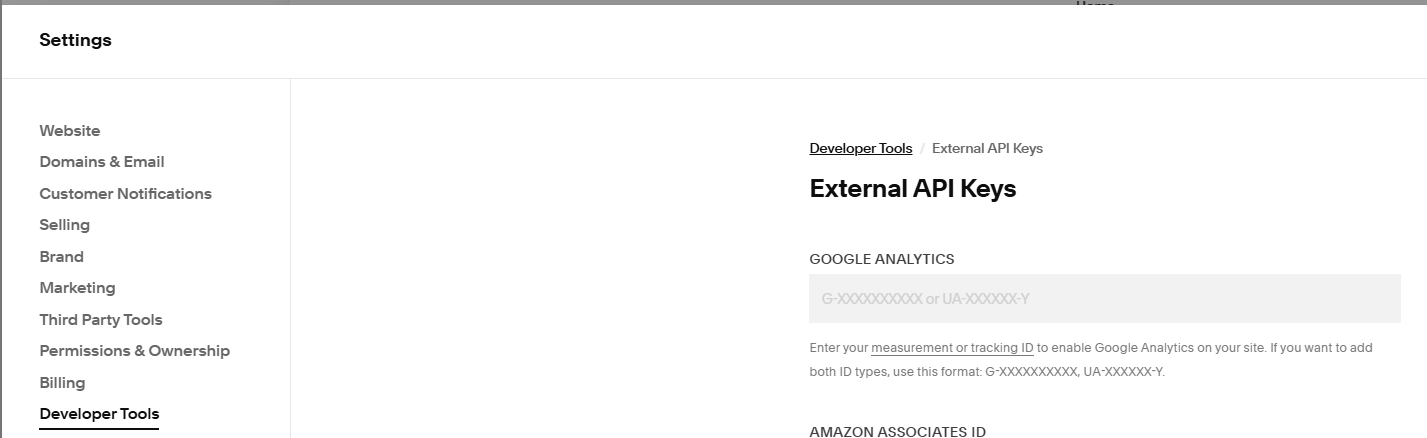
Add Your GA4 Measurement ID to Squarespace
Open the Developer tools panel>External API keys>enter your measurement ID in the Google Analytics field>Save
And that’s it, you’ve now integrated your Google Analytics 4 account with Squarespace! It may take 24 hours for your Squarespace data to populate, so I recommend doing this a couple of days before you launch your website or ecommerce store.
How to Track All GA4 Ecommerce Events in Squarespace
Why be satisfied with only tracking purchase data when the true insights are what happened before a purchase is made?
With custom Squarespace’s GA4 conversion tracking, you’ll have limited visibility into your ecommerce flow. You won’t be able to see all of the ecommerce events in GA4 like:
view_item_list: When a user views a list of products or offerings
view_item: When a user views a product
select_item: When a user selects a product from a list of items or offerings
add_to_cart: When a user adds products to their shopping cart
view_cart: When a user views their shopping cart
remove_from_cart: When a user removes items from their shopping cart (my solution will work when the user clicks on the decrement button to remove one product and when the user clicks on the “x” button to completely remove all products)
begin_checkout: When a user begins checkout (clicks on checkout button)
purchase: When a user makes a purchase

What if you could see what products are most likely to be removed from the cart, so you can do further analysis to understand what went wrong?
Or what if you could see which product is viewed the most from the product details page, but never purchased? With that information, you can run A/B tests to provide the details your customer needs to feel comfortable making that purchase, or find opportunities to upsell your customers.
What if you could see which marketing campaigns are more effective at bringing people to your store page vs. enticing people to make a purchase?
Well with my Squarespace + GA4 ecommerce services, you can! Here are two examples of detailed funnel reports you’ll be able to use to improve your customer’s experience in your Squarespace store:


I offer three “Taylored” solutions to help solve your ecommerce analytics challenges.
DIY Code: Are you comfortable with code and want a DIY solution? Then purchase my GA4 ecommerce Squarespace code for instant access to my custom code and a detailed guide to help you set it up yourself.
Full-Service Integration: Want me to handle the integration for you? My full ecommerce integration service is perfect—I'll write the exact code you need for your specific Squarespace website and provide you with a powerful analytics dashboard to show you all the new ecommerce data you now have access to.
Ecommerce Dashboard: If you just want the analytics dashboard without the hands-on work, you can simply purchase my Squarespace ecommerce dashboard for instant access to comprehensive ecommerce insights. My ecommerce dashboard gives you instant access to key metrics without the hassle of setup.
No matter which option works best for your business, my Squarespace + GA4 services will give you the ecommerce analytics you need to drive growth.
Why I created a custom solution
Technically, Squarespace offers a native GA4 integration in the Developer Tools Panel > External API Keys setting, but there are a few reasons why I wouldn’t recommend it:
Limited visibility
The integration is simple: copy and paste your measurement ID and Squarespace will handle the rest—but how do we know exactly what’s being sent to our sacred GA4 properties? We don’t—not definitely anyway—because Squarespace’s documentation doesn’t offer a lot of details.
There’s also no documented reason from Squarespace (that I’ve seen) explaining why they can’t push the product data that exists in JSON objects inside of each page’s HTML into the data layer to make data collection easier for its paying customers.
They purposefully obfuscate the data we need on the order confirmation page in a JSON object and delete the JSON a few seconds after the page fully loads making it nearly impossible to scrape the JSON and use it ourselves.
I have a problem with a service people pay for purposely making it harder to get access to their data.
Limited data collection
Based on Squarespace’s documentation, Squarespace only sends data when an item is purchased, which isn’t helpful if you’re trying to analyze the entire purchase journey. Squarespace indicates that it will send this information to GA4 with the purchase event:
Customer's city, region, and country
Product name
SKU
Order ID
Store name
Purchase total (including shipping)
Inability to customize the data before it’s sent to GA4
If you decide to use the built-in integration, you don’t have the ability to add additional data or customize the data before its sent to GA4. I prefer having control to change or reformat the data before its sent.

Ecommerce Insights At Your Fingertips
From which products are added and removed from your cart the most to how many users don’t complete the checkout process, my ecommerce dashboard takes the guesswork out of improving your ecommerce flow and increasing revenue.
Download it now for instant insights and a video that walks you through how I use the dashboard to increase my clients’ revenue!
How to Implement GA4 Ecommerce on Squarespace
If you’ve made it this far, you have hopefully been able to implement Google Analytics ecommerce analytics tracking using Squarespace’s external API to see your website’s ecommerce in Google Analytics.
Ready to unlock the full potential of your Squarespace store? Then hire me to ensure accurate and actionable e-commerce data in GA4.
My Squarespace + Google Analytics integration helps Squarespace users get data-based insights in less than a week to reduce purchase funnel drop out.
GOOGLE ANALYTICS SOLUTIONS FOR SMALL BUSINESSES


Frequently Asked Questions About Integrating Squarespace and Google Analytics
-
Absolutely! Most of my clients are able to receive data-driven insights 2 months faster when they hire me to set up their Google Analytics integrations. Schedule a quick 30 minutes call with me to get started!
In addition to integrating your Google Analytics account with Squarespace, you'll also get:
an ecommerce dashboard with all of the metrics you need to improve your ecommerce conversion rate.
a video walking you through how to use this data to increase revenue.
a wrap up call with me to recap the project and answer any of your questions.
-
While GA4 offers a robust interface for data analysis, you might find it easier and more time-saving to use a pre-built ecommerce dashboard like my Squarespace + Google Analytics Ecommerce Dashboard.
My dashboards provides a clear and intuitive overview of your key ecommerce metrics, eliminating the need for complex data exploration in the Google Analytics platform.
Benefits of using my Google Analytics Ecommerce Dashboard:
Instant access to the Squarespace ecommerce dashboard.
Comprehensive data visualizations showing essential metrics like product-specific conversion rate, checkout conversion rate, average order value, purchase funnel drop offs, and customer lifetime value (CLTV).
Reveal the landing pages that captivate your customers and drive revenue.
Marketing channel comparison of your top traffic sources, including organic search, paid search, social media, and more.
Save time by focusing on key metrics chosen by me, a Google Analytics expert with 10+ years of experience.
Actionable insights to improve your Squarespace purchase flow and marketing spend.
User-friendly interface: Navigate and customize the dashboard with ease.
A comprehensive video tutorial on how to use and edit the dashboard, and tips for how to use the data to improve your ecommerce conversion rate.
Ready to increase your ecommerce revenue and minimize purchase friction on your ecommerce site?
Then purchase my dashboard to get revenue generating insights from Google Analytics.
-
Yes, Squarespace supports Google Analytics 4. Check out my How to Add Google Tag Manager and Google Analytics to your Squarespace website blog to learn how to set this up.
-
Check out my How to Add Google Tag Manager and Google Analytics to your Squarespace website guides to learn how to set this up.
Or if you'd like insights faster, I can set up Google Analytics on your Squarespace website in less than a week! Learn more about my Squarespace and Google Analytics integration service.
-
Check out my How to Add Google Tag Manager guide to learn how to set this up.
Or if you'd like insights faster, I can set up Google Analytics and Google Tag Manager on your Squarespace website in less than a week! Learn more about my Squarespace and Google Analytics integration service.
-
To verify Google Analytics implementation, check for the tracking code snippet in your website's header. You can also use the Google Analytics Real-time Reports to see if there is activity on your site.
Or if you'd like to get your Google Analytics data without all of the trial and error, work with me to get it done in less than a week!
-
Common issues include incorrect tracking code implementation, missing or incomplete event tracking, and data filtering or sampling problems.
My clients hire me to get their Squarespace analytics integration done right without these problems. Learn how I can help you get set up in 3 days!
-
Yes, you can track custom events in Squarespace using Google Tag Manager to create and fire custom tags.
Check out my Google Analytics blog for GA4 custom event tracking help, or hire me to implement your custom event tracking. My clients usually get insights 2 months faster when they hire me!